How Do I Build a Railing?
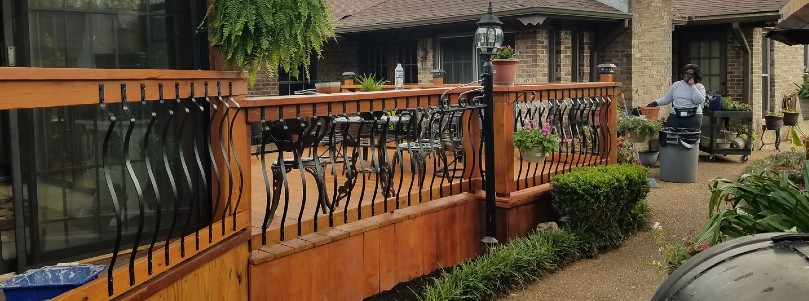
From first-time homeowners spending the weekend DIY building a new deck, to experienced deck builders updating a worn-down deck, knowing how to build a railing can protect your family and enhance your outdoor space. Besides protecting guests, children, and pets from dangerous trips and falls off the structure, a solid metal or wood deck railing system also increases the curb appeal of your home's outdoor living area.
Here are some straightforward and easy step by step DIY installation instructions on how to build a railing on a deck, porch, or balcony. Be sure to wear protective eye gear, work gloves, and solid footwear to keep your DIY deck rail install smooth and injury-free.
How Do I Build a Railing?
From first-time homeowners spending the weekend DIY building a new deck, to experienced deck builders updating a worn-down deck, knowing how to build a railing can protect your family and enhance your outdoor space. Besides protecting guests, children, and pets from dangerous trips and falls off the structure, a solid metal or wood deck railing system also increases the curb appeal of your home's outdoor living area.
Here are some straightforward and easy step by step DIY installation instructions on how to build a railing on a deck, porch, or balcony. Be sure to wear protective eye gear, work gloves, and solid footwear to keep your DIY deck rail install smooth and injury-free.
What to Know Before Starting DIY Deck Railing Installation
Before we go over how to build a railing for a deck, there are some important considerations you need to take into account. Make sure you understand that:
- Each state and region have their own unique set of deck building regulations. Be sure to check with your local building office before beginning your deck railing build.
- The majority of states throughout America require a minimum deck railing height of 36 inches from the deck board surface to the top edge of the top deck rail.
- States such as California and Washington generally require a minimum deck railing height of 42 inches from the deck board surface to the top edge of the top rail.
- Railing systems installed on a third-story area or higher typically require a minimum deck railing height of 42 inches, and can often increase up to 48 inches.

How to Build and Install a Deck or Porch Railing
Your outdoor living space needs a strong, solid deck frame before any railing build can go on. Learn more about deck framing and how to install deck support posts in the Decks 101: How to Frame a Deck guide.
1. Measure Your Deck Space and Determine How Many Railing Posts You'll Need
Use a tape measure to find the distance of each straight outside edge of your deck. Then you can begin determining the number of deck railing posts you will need and the post spacing. Plan on mounting deck posts in the two spots closest the house, as well as having posts at outer corners of the space.
If you have outdoor stairs on your deck area, plan on mounting deck posts at the top corners of the exterior stairway.
Deck railing posts are generally spaced 6 feet apart on-center, however, they should not exceed 8 feet apart on-center. Make sure your posts are evenly spaced. If a deck railing posts end up positioned directly above a deck joist, reposition it slightly.
2. Mounting the Railing Posts
Mark with a pencil the mounting locations of the deck railing posts on the deck board surface. Then, check underneath the pressure-treated or composite decking into the deck frame. The area below the post will require at least 4 inches of blocking for the deck post anchor fasteners to drive and anchor into. If there is not this substructure beneath, attach some yourself between the deck joists.
To mount your 4x4 deck post or 6x6 deck post, use a Post Base Anchor or Post Base Kit to firmly and securely attach the post to the deck and substructure. Watch these two quick videos to see how to attach deck posts to the deck surface in minutes.
3. Measure and cut deck rails to fit railing sections
Stretch the tape measure tightly between the center of one railing post, to the other, and note down the distance. With these measurements in hand, mark and trim your 2x4 or 4x4 railing lumber to size. Set the coordinating top and bottom rails side-by-side.

4. Attach deck baluster connectors to the top and bottom rails
Mark the center of the top and bottom rails, and then mark every 4-1/2 inches moving outward from the center of the deck rails. This is the standard spacing for deck balusters throughout the United States as there cannot be an opening of 4 inches anywhere within a railing section.
Continue this method for all top and bottom rail sections for your deck.
On these marks, use a drill to attach baluster connectors securely to the deck railing material.
If you would like a more specific deck baluster spacing to work with your deck's exact measurements, check out our helpful "How to Find Your Baluster Count and Spacing" video below.
5.Attach the bottom rail between deck posts with a deck rail connector
Secure the bottom rail to the posts using a deck rail bracket or a level rail connector. Use two spare pieces of wood to support the bottom rail up to the height you want it to be while attaching.
6. Slide deck balusters over the bottom rail baluster connectors
Push down each baluster to ensure it is seated fully on each connector.
7. Place and attach top deck rail
Starting from one end, feed each deck baluster over its coordinating baluster connector. When finished, lightly tap the top rail down in place via your fist or a rubber mallet.
Inspect the finished railing and secure top rail with two deck rail brackets.

Deck Railing Add-Ons
Now that you know how to build a deck railing with balusters, let's look at opportunities to personalize your area and make it more functional. Whether you want to add ambiance, improve usability, or enhance the overall look, the right extras can make a big difference. Here are some of the best ways to upgrade your railing.
Post Caps
Post caps aren’t just for looks—they help protect wood posts from moisture while adding a finished touch to your deck. Options range from simple flat designs to decorative metal and wood styles. If you want to take it up a notch, solar and LED-lit post caps provide soft lighting that makes your deck more inviting after dark.
Lighting
Good deck lighting keeps your outdoor areas usable and safe at night. While post cap lights offer a soft glow, under-rail LED strips add a sleek, modern touch. If stairs are part of your setup, recessed step lights make nighttime navigation easier. Prefer a no-wiring option? Solar lights can do the trick without adding to your electric bill.
Drink Rail
If you like to entertain, a drink rail is a must. Instead of a standard top rail, attach a wide deck board to create a flat surface—perfect for resting drinks, snacks, or even small planters. It’s a simple upgrade that makes your railing more functional while adding a polished look.
Privacy Screens
Need a break from nosy neighbors? Privacy screens give you a little breathing room while adding style to your deck. Wood slats, frosted glass, or lattice panels can all do the job. If you like a more natural look, try incorporating climbing vines or hanging planters.
Built-In Planters
Want to add plants but don’t want to clutter your deck? Built-in railing planters let you showcase flowers or herbs without taking up floor space. Clamp-on options are available if you don’t want a permanent installation.
Hooks and Small Accessories
Sometimes, it’s the little things that make an area feel complete. Adding hooks to your railing makes it easy to hang lanterns, string lights, or even a bird feeder. Small touches and accessories like these help personalize your deck and make it feel more inviting.
Final Thoughts
Your deck railing doesn’t have to be purely functional—it can be an extension of your style and how you use your deck. Whether you’re adding lighting, making it more entertainment-friendly, or just giving it a fresh look, these upgrades can take your deck from basic to standout.
Frequently Asked Questions
As a leader in the $4.1 billion North American deck market, DecksDirect has a wealth of knowledge to share. Here are some common questions we receive./p>
What’s the easiest deck railing to install for a DIYer?
Pre-assembled railing kits are the simplest option for DIYers. They come with pre-cut components and all necessary hardware, making installation straightforward. Metal and composite railing systems are often easier to work with than traditional wood railings since they don’t require as much cutting, sealing, or finishing.
Can I build a deck railing without posts?
Not really—railing posts are what give the structure its strength. However, you can minimize the number of visible posts depending on the type of railing system you use. A system with longer 8- or 10-foot panels will give you wider spans between posts. And some metal railings offer skinnier posts, which obstruct your view less.
How do I make sure my deck railing is level and even?
Start by using a chalk line or laser level to mark the railing height along your posts. When installing top and bottom rails, use clamps to hold them in place before securing them permanently. Checking for level after each step ensures a straight, uniform look.
Knowledge Center
Tips and tricks on deck building and designing from the experts here at DecksDirect!