You've got a good, strong deck, but your railing is starting to show signs of wear. Whether you're enjoying a quiet evening outside or hosting a lively gathering, a sturdy and attractive railing can make all the difference. Knowing how to add a railing to an existing deck is crucial for your deck's safety and longevity.
At DecksDirect, we understand that every deck is unique, so we offer a broad array of deck railing products to suit any style and budget. From modern metal railings to classic wooden designs and sleek glass options, you'll find everything you need to add railing to a deck right here. Our high-quality products are durable and easy to install, ensuring your deck looks great and stays safe for years.

Essential Planning Before You Add a Railing to a Deck
Before we discuss how to build a deck railing on an existing deck, we have to talk about planning. Good planning helps you avoid mistakes and ensures a smooth installation process. The first step is to assess the current structure of your deck. Check for any damage or weak spots that need fixing before you add the new railing. This will help you avoid any issues down the line.
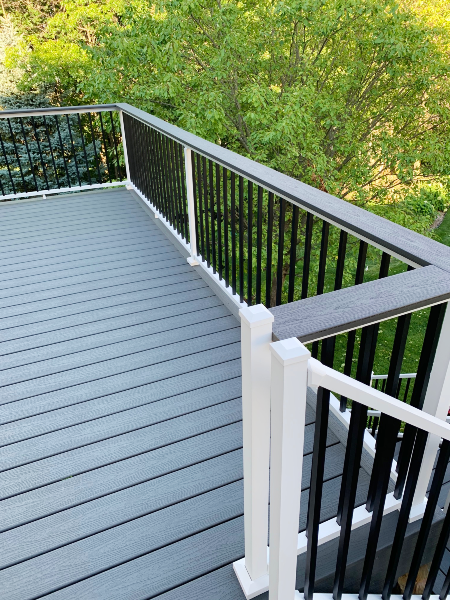
Next, you'll need to decide on the type of railing you want. Do you prefer the sleek look of metal, the classic charm of wood, or the modern appeal of cable or glass? Each material has its own benefits and can dramatically change the look of your deck. Take some time to consider what fits best with your home and personal style.
Review the best types of deck railing to help you make the appropriate choice. Our collection offers plenty of amazing systems. Revival aluminum railing is a great option to stay within your budget — it's a high-quality metal railing that's perfect for replacing a worn wood railing on a budget. To highlight your view, we recommend Skyline Cable Railing or Skyline Glass Railing - two more luxurious options that open up your deck views.
You'll also want to be aware of any building codes and regulations concerning how to add a railing to a deck. The International Residential Code outlines model requirements, but your state or local regulations may vary. Taking the time to plan and prepare will simplify the rest of the project. So, grab a notepad, make some sketches, and get ready to transform your deck into a beautiful and safe outdoor space.
Choosing the Right Materials and Tools
Adding railing to an existing deck requires the right materials and tools. Here's a handy list of what you'll need.
Materials
Depending on the type of railing you choose, your exact parts and pieces will vary. But in general, all railings will require these types of parts:
- Posts or Post Kits: The thicker uprights that anchor your railing to the deck.
- Rails: The longer horizontal pieces that run between posts. (Rails are often packaged together with infill in a Rail Kit).
- Infill: Infill is a decking term that essentially means "whatever goes between your posts and rails". It can be vertical balusters, horizontal balusters, stainless steel cable runs, glass panels, or mesh panels, among other options. (Infill is often packaged together with rails in a Rail Kit).
- Mounting Brackets and Hardware: These will help secure your rails to your posts.
- Post Caps and Base Covers: These add a finished look to your posts and protect them from the elements. (These are often packaged together with posts in a Post Kit).
- Screws and Bolts: You'll need these to attach the various parts of the railing system together.
- Post Mounting Lag Screws or Bolts: These thick screws or bolts secure your posts to your deck frame.
Check out our railing style guide for more tips on choosing a railing system and accessories.
Tools
These tools will help ensure a smooth installation:
- Measuring Tape: Accurate measurements are crucial for a successful installation.
- Level: Ensures that your railing is straight and even.
- Drill and Bits: You'll need these for making holes and driving screws.
- Screwdriver: Handy for tightening screws and bolts.
- Saw: If you need to cut parts of the railing system to fit, a saw will be essential.
- Safety Gear: Always wear gloves and goggles to protect yourself while working.

Step-by-Step Installation Guide to Add a Railing to an Existing Deck
The steps below are an excellent overall guide to adding a railing to an existing deck, but always check your manufacturer's instructions for specific details. Every railing system goes together a little differently, but in general, they'll all follow these broad steps.
Step 1: Measuring and Marking
First things first, you need to measure the perimeter of your deck. Use a measuring tape to get accurate dimensions. Once you have your measurements, mark the positions where the posts will go. Make sure to space them evenly for a balanced look and sturdy support.
Different railing systems offer different lengths of top and bottom rails. Make sure your posts are close enough together that your rails will reach.
Step 2: Installing the Posts
Now that your positions are marked, it's time to install the posts. You can mount them to the outside surface of the deck (called fascia mounting) or mount them directly on the deck surface. Make sure each post is straight and level before tightening everything down. For more information, check out our Guide to Installing Deck Railing Posts.
If your railing system uses once-piece post skirts, install them now, as they won't be able to slide over the post once your brackets and rails are attached. Some systems use two-piece post skirts that you can snap around the post at the end of your installation.
Step 3: Attaching Bottom Rails
With the posts in place, you'll typically install your bottom rails next, although this can vary depending on your specific railing system. Make sure to follow your manufacturer's instructions. When installing the bottom rail, Connect each section to the posts using the mounting brackets and hardware. It's essential to ensure that each section is aligned properly and level. Use a level tool to check as you go along.
You will typically have to cut your top and bottom rails down to shorter lengths to perfectly fit the span between each post.
Step 4: Adding Infill And Top Rails
Usually, you'll install your infill first, then cap everything off with the top rail. As always, though, your specific railing system might differ.
Infill is a decking term that refers to anything that fills the opening created between your posts and rails. Infill can be slimmer vertical uprights called balusters. Infill can also be balusters that run horizontally - these are sometimes called rods or rod rails. Some railing systems use horizontal or vertical cable runs or glass panels.
No matter your infill, make sure it's evenly spaced, and that there are no gaps of 4 inches or larger between anything. This is essential to meet building codes.
Your top rail will fasten to the posts in a very similar way as your bottom rail did.
Step 5: Finishing Touches
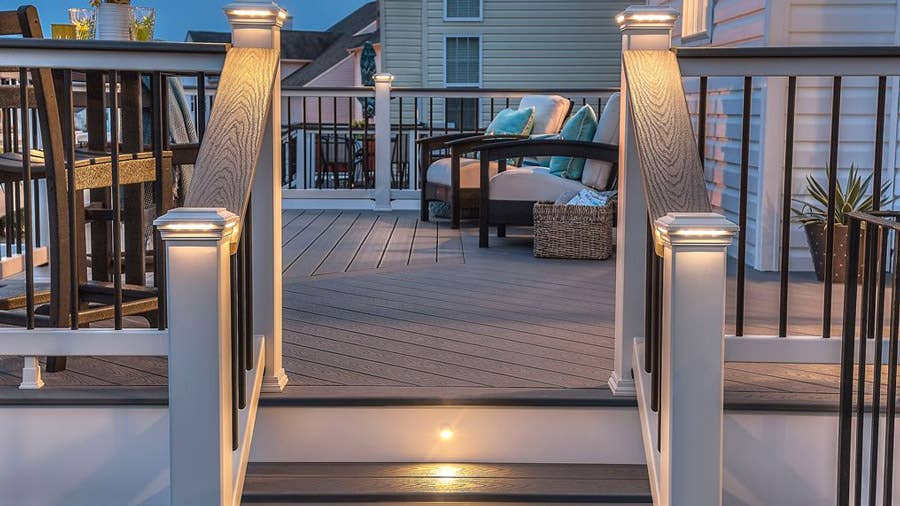
Finally, add the finishing touches to your railing. Place post caps on top of each post to give them a polished look and protect them from the weather. Secure your post caps with a line of silicone adhesive or a screw if your post cap comes with one. Add post skirts (also called base covers) at the bottom of the posts for a clean finish. Once everything is in place, inspect all the connections and tighten any screws or bolts as needed.

Expert Tips for a Smooth Installation
Safety should always be your top priority when working on any home improvement project, and adding a railing to your deck is no exception. Here are some tips to keep you safe:
- Wear Safety Gear: Always wear gloves and goggles to protect your hands and eyes.
- Use the Right Tools: Make sure you're using the correct tools for the job and that they are in good condition.
- Work in a Clean Area: To avoid tripping over tools or materials, keep your workspace tidy.
- Follow Instructions: Carefully follow the installation instructions that come with your railing system.
Common Mistakes to Avoid
Even with the best intentions, mistakes can happen. Here are some common pitfalls to watch for:
- Skipping Measurements: Don't rush through the measuring and marking process. Accurate measurements are crucial for a successful installation. Measure twice, cut once!
- Ignoring Level Checks: Make sure to use a level tool frequently to ensure your posts and railing sections are straight.
- Using the Wrong Hardware: Always use the recommended screws and bolts for your specific railing system. Using the wrong hardware can compromise the stability of your railing.
- Overtightening Screws: Be careful not to overtighten screws and bolts, as this can damage the materials.
Advice on Maintaining the Railing
Once your railing is installed, you'll want to keep it looking great and functioning well. Here are some maintenance tips:
- Regular Cleaning: Clean your railing regularly to remove dirt and debris. A simple wipe-down with soapy water usually does the trick.
- Inspect for Damage: Periodically check your railing for any signs of wear or damage. Replace damaged parts and tighten loose screws.
- Protect Against Weather: If you have a wooden railing, consider applying a sealant to protect it from the elements. For metal railings, check for rust and treat it promptly.
- Avoid Harsh Chemicals: When cleaning, avoid using harsh chemicals that can damage the finish of your railing.
FAQs: How To Add a Railing to an Existing Deck
Knowing how to add a railing to a deck is one thing; getting all your questions answered is another. DecksDirect fields many questions about how to build deck railing on an existing deck, and our customers rely on the information we provide. Here are some common questions we receive.
Can I Install Deck Railing by Myself, or Do I Need Professional Help?
Yes, you can install deck railing by yourself if you have basic DIY skills and the right tools. Most railing systems come with detailed instructions that make the process straightforward. However, if you're not comfortable with DIY projects, hiring a professional can ensure the job is done correctly and safely.
How Long Does it Typically Take to Install Deck Railing?
The time it takes to install deck railing can vary depending on your deck's size and the type of railing you choose. On average, it can take anywhere from a few hours to a full day. Preparation and planning can speed up the process. For a quicker install, look for a system with pre-welded panels and pre-bracketed posts, like Fortress FE26.
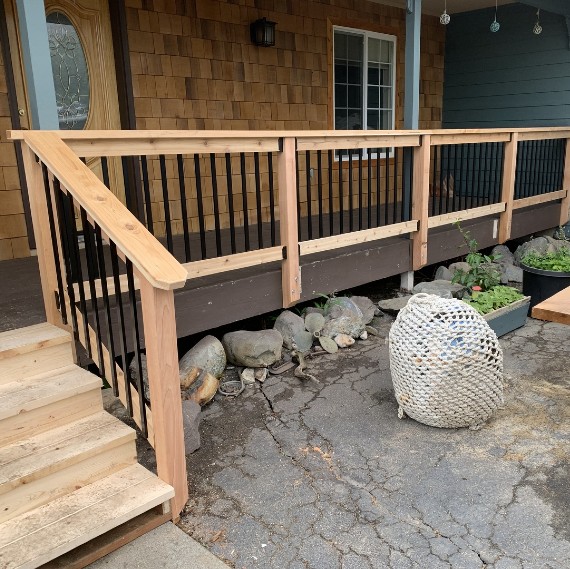
Can I Mix Different Types of Materials for My Deck Railing?
Absolutely! Mixing materials can create a unique and stylish look. For example, you can combine wood posts with metal balusters or rails or use glass panels with aluminum frames. Just make sure the materials are compatible and securely installed.
How Do I Choose the Right Height for My Deck Railing?
The height of your deck railing should comply with local building codes, which typically require railings to be 36 to 42 inches high for residential decks. It's essential to check your local regulations before installation to ensure your railing meets safety standards. For more information, check out this knowledge builder article on ensuring your deck railing height meets building codes.
Order Deck Railing From DecksDirect
Now that you know how to add railing to an existing deck, you're ready for the next step. With DecksDirect, you can access a wide range of high-quality railing products that are easy to install and built to last. Browse our deck railing today to explore our diverse selection and find the ideal railing system for your deck.
Shop NowKnowledge Center
Everything you need to know about installing decks and railings, straight from the pros at DecksDirect!